NOTE. After the newest update from Apple (10.12 Sierra) they no longer support PPTP connections. Therefore those instructions will not work for the newer MacOS operating systems. Guidelines for MacOS Sierra and newer can be found here: VPN for MacOs 10.12+
Instructions for VPN connection with MacOs 10.11 and older:
1) Click on the Apple symbol. Choose "System Preferences" and click "Network". Choose the plus sign in the lower left corner: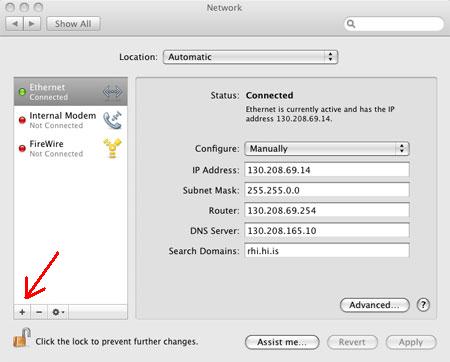
2) Click the arrows on the right side of the window named Interface and choose "VPN". The VPN type should be "PPTP" and the service name can be what you want like: Háskóli Íslands. Then click "Create":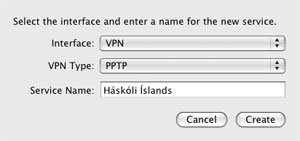
3) Click on the connection you just made.
4) For Account name write your username, students type username@nemendur.hi.is but employees should type username@starfsm.hi.is
5) For "Encryption" you choose: "Maximum"
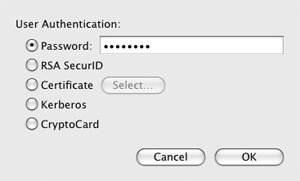
6) In Authentication settings you type your password. The password should be the same as for Ugla. Click "Remember this password".
7) Check Show VPN status in menu bar.
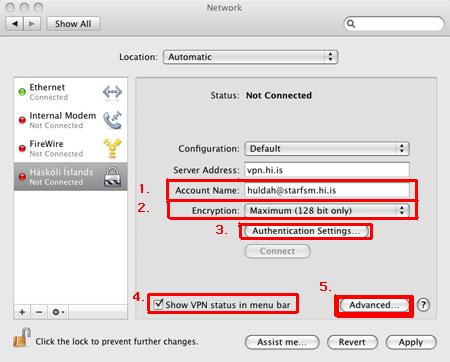
8) Click "Advanced" and check "Disconnect when switching user accounts", "Disconnect when user logs out" and "Send all traffic over VPN connection" then press "OK":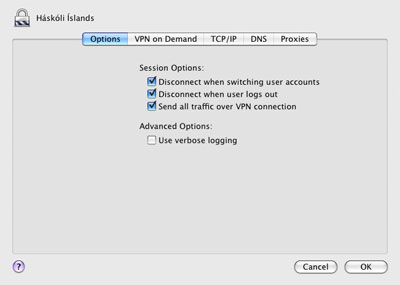
9) Click "Apply" then "Connect":
10) The connection should now be active and the window should look similar to the one below: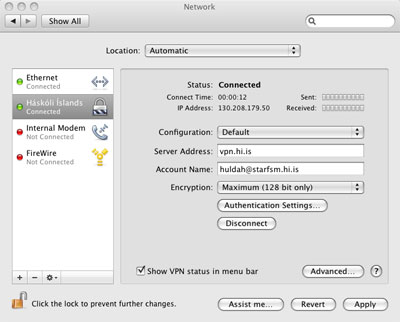
11) Up in the bar menu a symbol for the VPN connection should appear now. In order to connect or disconnect you only have to click the symbol and select the appropriate operation:
Note! it is not possible to connect to VPN while you are connected to the wireless eduroam on campus, Student housing or with ADSL through UoI because you are already connected to HINET.

